
While it can feel a bit daunting, doing your own manicure at home is not only totally doable, but it will save you tons of money in salon visits and you get the convenience of switching out your look from home.
Whether you are an at-home nail enthusiast or new to the game, we’ve broken manicures down into seven easy steps that you can follow on your next night in. These tips also apply for pedicures as well, so don’t skip your feet, especially in summer.
While there are lots of different types of manicures out there (gel, acrylic, dip powder, etc.), this tutorial is for a basic manicure using regular nail polish. Choose a solid shade for a classic manicure, or a chic French tip design, or add your own nail art for extra flair!
Looking for nail art design ideas? Check out these posts for natural or acrylic nails:


What are the different nail shapes you can choose from for a manicure?
While it all comes down to personal preference for which shape you like best, there are lots of choices to choose from when it comes to nail shape: round, square, oval, squared oval, almond, stiletto, ballerina, and coffin.
- Round: A popular choice for those who prefer short nails, rounded nails are straight on the sides and then rounded off at the top.
- Square: Square nails are straight on top with squared off corners and straight edges. They don’t taper in or flair out but are truly straight on each side.
- Oval: While similar to the round look, oval nails elongate the nail shape even more and are rounded off a bit on the sides as well as the top edge.
- Squared Oval: Also known as “squoval,” this shape is more rounded at the edges than the true square shape, so it’s nice for those who like a flat top edge but want a softer look.
- Almond: For a more chic vibe, the almond shape is a vintage classic. Rounded at the tip but tapered off on the sides, this shape resembles an actual almond.
- Stiletto: If drama is your middle name, then the stiletto nail may be for you. With its sharper point than an almond and tapered sides, it’s the ultimate way to make your nails look longer.
- Ballerina: The ballerina shape has a straight top edge, but the sides taper down in a bowed flair shape for a striking yet delicate look.
- Coffin: Coffin nails are similar to a ballerina, but are more angled and straight on the sides so they resemble a traditional coffin shape.


For a basic manicure, you’ll want to start by removing regular nail polish with a quick swipe of a cotton round and nail polish remover.


If you’re removing gel polish, you’ll want to rough up the top of the polish with an emery board, soak a cotton ball (or cotton round) in acetone, place one cotton ball on each nail, and tightly wrap the nail with a piece of foil or a nail clip for 10-15 minutes until the polish is softened and can be scraped off with a nail scraper tool.
After the first round of soaking, if there are any stubborn spots, you can repeat the soaking on that nail until the polish can be scraped away. They also make foils with the acetone pad already included to make it easier.

Try this nail polish remover that quickly removes polish as well as helps strengthen nails with the addition of hydrolyzed silk, vitamin E and vitamin B5.

For an acetone-free polish remover, this highly rated nail polish remover doesn’t dry out nails and is free of free of gluten, parabens, talc, artificial colors, synthetic fragrances, SLS & phthalates.


Before you can get to work on the actual nail beds themselves, you’ll want to take off any extra nail length with clippers and then perfect your nail shape with a nail file. There are so many nail shapes to choose from, so find the shape that you like best and accentuates your individual hand shape.
Use the clippers to remove the length that you want from your nails. Then, take your nail file and file in one direction only (rather than back and forth like a sawing motion) to achieve the shape you want for each nail.
As a rule of thumb, you’ll want to do 90% of your nail shaping with the clippers and then finish off and fine tune the rest of the shape with the file.

While you don’t need fancy clippers, make sure to have a good stainless steel pair and clip from the sides towards the center to remove excess and roughly shape the nail.

Having a double sided emery board is helpful so you can use the rougher side when you want to quickly remove length and then the smoother side to fine tune the shape.

To properly prep your nails for polish application, you’ll want to first gently buff them with a nail buffer to remove ridges and gently texture the surface of your nail so the polish will have something to grab onto.


For an all-in-one shaping and buffing block, you can use a 4 sided block like this to file, shape, and buff your nails all with one tool (just skip the polish and shine side if you are applying polish).

When it comes to cuticle care, there is a big debate over whether or not you should fully cut out your cuticles when doing a manicure.
While some people prefer the look, the cuticle skin acts as a barrier to protect your skin from bacteria and infection, so we recommend leaving the skin there and just gently pushing back the cuticles a bit with a cuticle pusher.
If there’s a bit of rough skin left or uneven nail surface revealed under the cuticle you push back, use the edge of a buffer to gently buff that area away to match the rest of the nail.


Lastly, nip off any hangnails with a pair of cuticle nippers (or just regular nail clippers) and you’re ready to move onto the next step. Just make sure you’re only cutting dead skin cells that are hanging off the nail rather than live skin.

These angled orange wood nail sticks are perfect for gently pushing back cuticles and the pointed sides are nice for cleaning up small polish mistakes around the nail or getting dirt from the underside of the nail.

This glass manicure stick can be used over and over and easily cleaned with an angled end for cuticle pushing and a pointed end for small detail clean up.

Cuticle pushers like this one are great for gently pushing back the cuticle with a rounded edge and double to help scrape off softened gel manicures.

While you don’t need to remove your cuticle, nippers like these are still really helpful for trimming off pesky hangnails or small patches of dead skin.

To keep your hands looking good through the duration of your manicure, do a quick exfoliation with a hand sugar scrub and then moisturize after thoroughly washing off the scrub (use your cuticle sticks to get out any scrub stuck under nails, etc.). This is when you’d get a hand massage at the salon, so feel free to massage your own hands a bit to relax the muscles.
To make sure your polish sticks to your nails properly, you’ll want to quickly wipe off the nail beds with a cotton pad and rubbing alcohol or an alcohol pad to remove any oily moisturizer from your nails.

This hand and body scrub is perfect for removing dead skin and is infused with coconut oil, vitamin E, and hibiscus flower.

Moisturize your hands with this amazing lotion designed to keep your hands and cuticles baby soft.

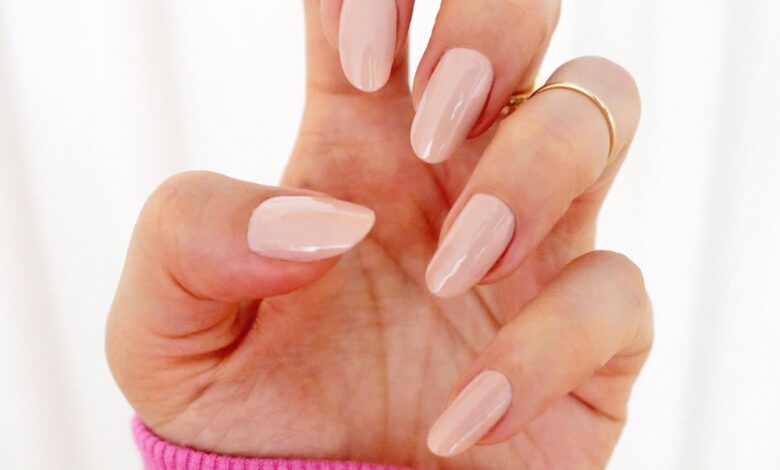
Now it’s time for the polish! If you want your polish to last longer and keep your natural nails from yellowing, start with a base coat before adding your color. Wait 2-3 minutes before adding your first layer of colored polish and another 2-3 minutes for a second coat. Make sure to paint with thin layers of polish so the coats dry evenly.
If you’re wanting to do a French manicure, paint your first coat of polish with the light pink shade and when dry use a French tip nail sticker guide before painting on the white tip.
If you get any polish on your skin or cuticles, you can gently remove it with the tip of a cuticle stick or a nail brush dipped in alcohol.
Finish off with a top coat for extra shine, durability, and protection against chipping and allow your manicure to dry for about 15-20 minutes before using your hands lightly and 1-2 hours to fully set before heavier use.

Start with a good quality base coat like this Essie Strong Start to keep your manicure firmly attached to your nails.

Match your nail polish color to your outfit or season and use thin layers so each layer will dry properly. Essie is a favorite brand and the color options are endless.


To make your manicure last and protect from chips, be sure to use a top coat and it will give your nails extra shine as well. If you’re in a hurry to set your nails, you can use a quick dry top coat as well.

Once your manicure is fully dry, add some cuticle oil around where the skin meets the nail and rub it into the skin gently. Allow the oil to soak in for 5-10 minutes before wiping off any excess and add oil daily to keep cuticles healthy, soft, and avoid hangnails and dry patches.

This cuticle oil uses cold-pressed safflower oil, winterized sunflower oil, and vitamin E to soften and nourish cuticles.

Frequently Asked Questions
How do you make a manicure dry faster?
You can use a hairdryer on the “cool” setting or sit in front of a fan to get your nails to dry faster.
You can also use a nail dryer made for regular polish or submerge your hands in an ice bath in a bowl for several minutes and then allow to air dry for 2-3 minutes after.
Should you cut your cuticles in a manicure?
Since the cuticle skin acts as a barrier to protect your skin from bacteria and infection, we recommend leaving the skin there and just gently pushing back the cuticles a bit with an angled wooden nail stick.
Source link