As mobile apps grow and reach people around the world, making them suitable for different languages and regions becomes very important. This process, called localization, ensures the app feels natural and easy to use for everyone, no matter where they are.
Good localization can greatly improve the user experience, making the app more accessible and attractive to more people.
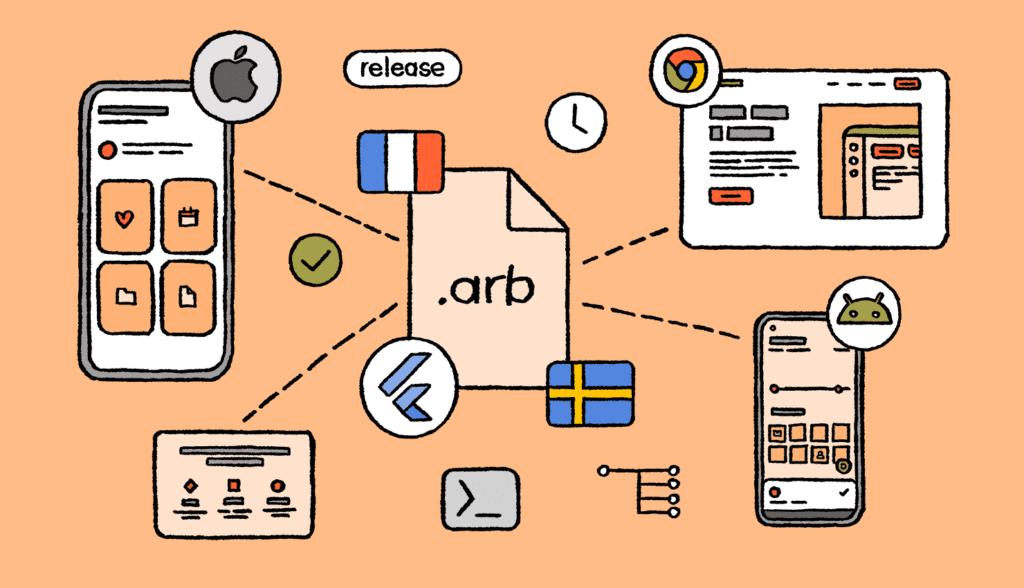
This article will walk you through how to localize a Flutter app development, making it accessible to people all around the world. Here’s what we’ll cover:
- What is Localization and Why it Matters: We’ll start by understanding what localization is and how it can benefit your app.
- Setting up Localization in Flutter: This includes adding the necessary dependencies and tweaking the MaterialApp widget to support multiple languages.
- Creating Language Files: You’ll learn how to create files for different languages your app will support.
- Generating Localization Classes: We’ll show you how to generate the necessary classes for localization using the intl_translation package.
- Implementing Localization in Widgets: We’ll show you how to use these localization classes in your Flutter widgets.
- Handling Dynamic Locale Changes: You’ll learn how to change the app’s language dynamically while it’s running.
- Advanced Localization Techniques: We’ll explore some advanced tips and tricks for more effective localization.
- Recap and Additional Resources: We’ll summarize the key points and provide resources for further learning.
By the end of this article, you’ll have a solid understanding of how to localize your Flutter app building, making it more appealing and user-friendly for a global audience.
What is Application Localization?

Localization is the process of tailoring a product or content for a specific region or market.
For mobile apps, this means translating the mobile app’s text into various languages and adjusting cultural elements like date and time formats, currency, and measurement units to fit the preferences of users in different areas. Localization makes sure the mobile app feels natural and user-friendly to people, no matter where they are or what language they speak.
Localization vs Internationalization
While localization and internationalization are related, they play different roles in making an app accessible to a global audience:
- Internationalization (i18n): Think of this as setting up your app to handle multiple languages and regions from the start. It means organizing your code so that the text and other regional details are easy to change without rewriting significant code patches of the app.
- It’s like building a house with the wiring ready for any kind of plug.
- Localization (l10n): This comes after internationalization. It’s about making those changes to adapt your app for specific regions. This includes translating the text and adjusting things like date formats, currency, and measurements to match local preferences.
- It’s akin to adding the right plugs and outlets to match the local electricity standards.
In simpler terms, internationalization is about preparing your app to handle different languages and regions, while localization is about making those changes to ensure the app feels natural and user-friendly in each place.
Advantages of Localization
Localizing your Flutter app has some great benefits:
- Reach More People: When your app supports multiple languages and regions, more people can use it, which can help you grow your user base and expand your market.
- Better User Experience: People prefer using apps in their own language and that follow their cultural norms. This makes them more comfortable and happy with your app, leading to higher satisfaction and user loyalty.
- Stand Out from Competitors: Having a localized app can set you apart from competitors who may only offer their app in a few languages. This gives you an edge in global markets.
- Boost Revenue: By reaching more users and providing a better experience, your app can get more downloads, better reviews, and higher revenue, especially in areas where people have more buying power.
Understanding and applying localization can help you build a more inclusive and successful Flutter app that connects with users worldwide.
Localization Setup
Modify Main File
To get your Flutter app ready for different languages, you’ll need to tweak the MaterialApp widget. Here’s how you can do it in simpler terms:
- Open Your Main File: Go to your main.dart file where your app starts.
- Update MaterialApp: Make changes to the Material App widget to support different languages:
import ‘package:flutter/material.dart’;
import ‘package:flutter_localizations.dart’;
void main() {
runApp(MyApp());
}
class MyApp extends StatelessWidget {
@override
Widget build(BuildContext context) {
return MaterialApp(
// Add these lines to support localization
localizationsDelegates: [
GlobalMaterialLocalizations.delegate,
GlobalWidgetsLocalizations.delegate,
GlobalCupertinoLocalizations.delegate,
],
supportedLocales: [
const Locale(‘en’, ”), // English
const Locale(‘es’, ”), // Spanish
// Add more languages here
],
locale: Locale(‘en’), // Default language
home: MyHomePage(),
);
}
}
In this setup:
- localizationsDelegates: These help Flutter to handle language-specific tasks like formatting dates and numbers.
- supportedLocales: List the languages your app will support. Each Locale entry represents a language (like ‘en’ for English) and optionally a region (like ‘US’ for United States).
- locale: Specifies the default language your app will use.
Updating these settings makes your app ready to speak different languages and connect with users globally.
Add Locales
The supportedLocales in MaterialApp tells your app which languages it can handle. Each locale, defined with a Locale object, includes a language code (like ‘en’ for English) and sometimes a country code (like ‘US’ for United States).
This helps your app speak the right language and fit in wherever it’s used.
supportedLocales: [
const Locale(‘en’, ”), // English
const Locale(‘es’, ”), // Spanish
const Locale(‘fr’, ”), // French
const Locale(‘de’, ”), // German
// Add more locales as needed
],
Providing Delegates
To make sure your Flutter app can speak different languages and look right for every user, you need localization delegates. These delegates are like expert translators for your app’s interface:
Include these experts in your MaterialApp settings:
localizationsDelegates: [
GlobalMaterialLocalizations.delegate,
GlobalWidgetsLocalizations.delegate,
GlobalCupertinoLocalizations.delegate,
// You can also add your own delegate here if needed
],
These settings help your app handle various languages and styles:
- delegate: Makes Material Design widgets understand different languages.
- delegate: Helps basic widgets adapt to different languages.
- delegate: Ensures Cupertino-style widgets (like on iOS) speak the right language too.
With these setup steps, your app gets ready to change its language and cultural details based on what users prefer. It’s like laying the groundwork for your app to become multilingual and user-friendly worldwide.
Adding Language Files
In Flutter, ARB files are like organized dictionaries that hold all the different languages your app speaks. Each ARB file is in simple JSON format, and it’s dedicated to one language style. Inside, you’ll find pairs of keys and their matching phrases in that language.
They’re designed to be easy to update and keep track of, which is why a lot of mobile developers use them to manage how their apps speak different languages.
Structure
ARB files are like organized lists that store translations for your app. They’re designed to be simple and straightforward:
Each file contains pairs of keys and their corresponding translated phrases. For each key, there’s extra info like descriptions or notes. These details help translators understand where and how each phrase should be used in the app.
Here’s an example of what you’d see in a typical ARB file:
{
“key”: “value”,
“@key”: {
“description”: “Description of what this phrase means”,
“type”: “text”
}
}
It’s set up this way to make it easy to keep track of all the different languages your app supports and how everything should look and sound in each one.
English File
Here’s how an ARB file might look for English (en), where it stores two simple phrases—a title and a welcoming message:
{
“title”: “Welcome”,
“message”: “Hello, World!”,
“@title”: {
“description”: “This is the title displayed when the app opens”,
“type”: “text”
},
“@message”: {
“description”: “A friendly greeting shown to the user”,
“type”: “text”
}
}
In this setup:
- “title” holds the word “Welcome” that appears as the app’s title.
- “message” displays “Hello, World!” to greet users.
- @title gives a quick note about what the “title” text means in the app.
- @message explains what the “message” text says, helping translators understand where and how to use it.
These files are made this way to keep things organized and clear, making it easier for everyone involved in translating your app into different languages.
Spanish File
Here’s how the ARB file looks for Spanish (es), which translates the same keys used in English into Spanish:
{
“title”: “Bienvenido”,
“message”: “¡Hola, Mundo!”,
“@title”: {
“description”: “El título que aparece al abrir la aplicación”,
“type”: “text”
},
“@message”: {
“description”: “Un saludo amigable mostrado al usuario”,
“type”: “text”
}
}
In this example:
- “title” now says “Bienvenido,” which means “Welcome” in Spanish.
- “message” translates to “¡Hola, Mundo!” for “Hello, World!” in Spanish.
- @title describes what the “title” text means for translators.
- @message explains the purpose of the “message” text.
These files are named by their locale, like app_en.arb for English and app_es.arb for Spanish. By keeping these files organized, you can easily add new languages and update translations whenever needed. This ensures your app speaks fluently to users around the world.
Localization Class Generation
The intl_translation package is really handy for turning ARB files into Dart code that your Flutter app can use to talk in different languages. Here’s how you set it up:
First, you add the intl_translation package to your pubspec.yaml file under dev_dependencies:
dev_dependencies:
intl_translation: ^0.17.10
After adding this, run flutter pub get in your terminal to install the package.
This package does the heavy lifting of converting your app’s language files into code that helps your app switch languages smoothly. It’s like having a language expert that makes sure your app speaks fluently to everyone who uses it.
Running Command for Generation
Once your ARB files are set up and you’ve installed the intl_translation package, the next steps involve turning these files into usable Dart code for your Flutter app.
Here’s how you do it:
Extract Messages: First, create a template file (intl_messages.arb) that lists all the words and phrases you want to translate in your Dart code. Use this command to find and list them:
flutter pub pub run intl_translation:extract_to_arb –output-dir=lib/l10n lib/main.dart
- This command scans your Dart code (starting from lib/main.dart) to find the words that need translating. Then, it creates a new intl_messages.arb file in the lib/l10n folder.
Generate Dart Files: Once you have your ARB files (like app_en.arb and app_es.arb) ready with translations, it’s time to turn them into actual Dart files that your app can use. Run this command:
flutter pub pub run intl_translation:generate_from_arb –output-dir=lib/l10n –no-use-deferred-loading lib/l10n/intl_messages.arb lib/l10n/app_*.arb
2. This command takes those ARB files and makes them into Dart files, putting them in the lib/l10n folder.
These steps are like turning a book into a language that everyone can read. It helps your app understand different languages so it can speak to people wherever they are.
Overview of Files
The intl_translation package creates a few important files that help your app handle different languages:
- messages_all.dart: This file gathers and loads all the translated messages from your ARB files. It’s like a library that holds all the translations your app needs.
- messages_<locale>.dart: For each language (like messages_en.dart for English or messages_es.dart for Spanish), the package makes a special Dart file. These files contain all the translated phrases for that language, making sure your app speaks fluently in each locale.
- intl_messages.arb: This file is where it all starts. During the first step, it’s created to list all the words and sentences in your app that need translating. Think of it as the blueprint that guides the translation process.
These files work together to make sure your Flutter app can switch languages smoothly and sound natural wherever it’s used. Following these steps ensures your app can be understood and loved by users all around the world.
Adding Localization in Widgets
Using Localized Strings in Widgets
Once you’ve generated the localization classes, the next step is to incorporate these translated phrases into your Flutter widgets. Here’s how you can do it:
- Accessing Localizations: The generated classes provide an easy way to access these translations, often through a singleton pattern. Typically, you can retrieve localized strings by using the Localizations.of method within your widgets.
- AppLocalizations Class: Depending on your setup, you might utilize an AppLocalizations class instead. This class serves as a conduit, facilitating your widgets in finding and displaying the appropriate translations.
By following these steps, your Flutter app can seamlessly switch between languages, ensuring clear communication and a welcoming user experience worldwide.
Example: Using Localized Strings in a Widget
Here’s a simple guide on how to integrate and display localized phrases in a Flutter widget:
Import Generated Localization Files:
Start by importing the necessary localization files at the beginning of your Dart file. This includes the generated AppLocalizations class.
import ‘package:flutter/material.dart’;
import ‘package:flutter_localizations/flutter_localizations.dart’;
import ‘generated/l10n/app_localizations.dart’; // Adjust the path as needed
Modify MaterialApp to Use Localizations:
Ensure your MaterialApp setup includes the generated localization delegates and lists supported locales.
import ‘package:flutter_localizations.dart’;
import ‘package:flutter/material.dart’;
void main() {
runApp(MyApp());
}
class MyApp extends StatelessWidget {
@override
Widget build(BuildContext context) {
return MaterialApp(
// Add these lines to support localization
localizationsDelegates: [
GlobalMaterialLocalizations.delegate,
GlobalWidgetsLocalizations.delegate,
GlobalCupertinoLocalizations.delegate,
],
supportedLocales: [
const Locale(‘en’, ”), // English
const Locale(‘es’, ”), // Spanish
// Add more languages here
],
locale: Locale(‘en’), // Default language
home: MyHomePage(),
);
}
}
Access Localized Strings in a Widget:
Utilize the AppLocalizations.of(context) method within your widget to access localized strings.
class MyHomePage extends StatelessWidget {
@override
Widget build(BuildContext context) {
return Scaffold(
appBar: AppBar(
title: Text(AppLocalizations.of(context)!.title), // Display localized title
),
body: Center(
child: Text(AppLocalizations.of(context)!.message), // Display localized message
),
);
}
}
In this example:
- of(context) retrieves the localized instance of the AppLocalizations class.
- title and message properties correspond to keys defined in your ARB files for different languages.
Here’s a simplified view of how your ARB files might look for the above example:
English (en) ARB File:
{
“title”: “Welcome”,
“message”: “Hello, World!”,
“@title”: {
“description”: “Title for the welcome message”,
“type”: “text”
},
“@message”: {
“description”: “A friendly greeting”,
“type”: “text”
}
}
Spanish (es) ARB File:
{
“title”: “Bienvenido”,
“message”: “¡Hola, Mundo!”,
“@title”: {
“description”: “Título para el mensaje de bienvenida”,
“type”: “text”
},
“@message”: {
“description”: “Un saludo amistoso”,
“type”: “text”
}
}
Following these steps ensures your Flutter app displays the correct localized content based on the user’s language preference, delivering a seamless experience for your global audience.
Handling Locale Changes Dynamically
To ensure your app is user-friendly and adaptable, allowing users to switch languages while using the app is crucial. Flutter provides a straightforward way to achieve this by updating the locale of MaterialApp dynamically. Here’s a simplified approach using StatefulWidget for managing state:
Setting Up State Management
Begin by setting up the state management for handling locale changes:
import ‘package:flutter/material.dart’;
import ‘package:flutter_localizations/flutter_localizations.dart’;
import ‘generated/l10n/app_localizations.dart’; // Adjust the path as needed
void main() {
runApp(MyApp());
}
class MyApp extends StatefulWidget {
@override
_MyAppState createState() => _MyAppState();
}
class _MyAppState extends State<MyApp> {
Locale _locale = Locale(‘en’); // Default locale is English
// Function to update the locale
void _changeLocale(Locale locale) {
setState(() {
_locale = locale;
});
}
@override
Widget build(BuildContext context) {
return MaterialApp(
localizationsDelegates: [
AppLocalizations.delegate,
GlobalMaterialLocalizations.delegate,
GlobalWidgetsLocalizations.delegate,
GlobalCupertinoLocalizations.delegate,
],
supportedLocales: [
const Locale(‘en’, ”), // English
const Locale(‘es’, ”), // Spanish
// Add other supported locales here
],
locale: _locale, // Dynamically updated locale
home: MyHomePage(onLocaleChange: _changeLocale),
);
}
}
Creating the Locale Change Function
Define a function within your StatefulWidget to handle the locale change. This function updates the _locale variable when called:
void _changeLocale(Locale locale) {
setState(() {
_locale = locale; // Update the locale
});
}
Utilizing Locale in Widgets
In your app’s widgets, utilize the updated _locale variable to dynamically display localized content:
class MyHomePage extends StatelessWidget {
final Function(Locale) onLocaleChange;
MyHomePage({required this.onLocaleChange});
@override
Widget build(BuildContext context) {
return Scaffold(
appBar: AppBar(
title: Text(AppLocalizations.of(context)!.title), // Display localized title
),
body: Center(
child: Column(
mainAxisAlignment: MainAxisAlignment.center,
children: [
Text(
AppLocalizations.of(context)!.message, // Display localized message
style: TextStyle(fontSize: 18),
),
SizedBox(height: 20),
ElevatedButton(
onPressed: () => onLocaleChange(Locale(‘es’)), // Example of changing to Spanish locale
child: Text(‘Switch to Spanish’),
),
],
),
),
);
}
}
Following these steps enables your Flutter app to dynamically adjust its language based on user preferences. This enhances user experience by ensuring that content is displayed in the user’s preferred language, contributing to a more inclusive and accessible application.
Implementing a Language Selection Dropdown
To empower users with the ability to choose their preferred language, you can integrate a dropdown menu within your MyHomePage widget. This feature allows users to effortlessly switch between supported languages.
Enhance your MyHomePage widget with a dropdown menu that facilitates language selection:
class MyHomePage extends StatelessWidget {
final Function(Locale) onLocaleChange;
MyHomePage({required this.onLocaleChange});
@override
Widget build(BuildContext context) {
return Scaffold(
appBar: AppBar(
title: Text(AppLocalizations.of(context)!.title),
),
body: Center(
child: Column(
mainAxisAlignment: MainAxisAlignment.center,
children: <Widget>[
Text(AppLocalizations.of(context)!.message),
SizedBox(height: 20),
DropdownButton<Locale>(
value: Localizations.localeOf(context),
icon: Icon(Icons.language),
onChanged: (Locale? newLocale) {
if (newLocale != null) {
onLocaleChange(newLocale);
}
},
items: <Locale>[
Locale(‘en’, ”), // English
Locale(‘es’, ”), // Spanish
// Add other supported locales here
].map<DropdownMenuItem<Locale>>((Locale locale) {
return DropdownMenuItem<Locale>(
value: locale,
child: Text(_getLocaleName(locale)),
);
}).toList(),
),
],
),
),
);
}
String _getLocaleName(Locale locale) {
switch (locale.languageCode) {
case ‘en’:
return ‘English’;
case ‘es’:
return ‘Spanish’;
// Add other supported languages here
default:
return locale.languageCode;
}
}
}
Explanation
- DropdownButton: This widget displays a dropdown menu with language options. It shows the current selected language and triggers the onChanged function when a new language is chosen.
- onLocaleChange: This function is passed from the parent widget (typically MyApp) and updates the app’s locale when a new language is selected.
- _getLocaleName: This method converts the language code into a readable language name for display in the dropdown menu.
Incorporating a language selection dropdown into your Flutter app enables users to switch languages seamlessly. This feature enhances user experience by providing flexibility and inclusivity, ensuring your app is accessible and appealing to a global audience.
Summary of How to Perform Localization in Flutter
In this guide, we explored the fundamental aspects of making your Flutter app accessible across different languages and regions. Here’s a recap of what we covered:
Understanding Localization
Localization involves adapting your app to cater to specific languages and cultural preferences of users worldwide. It ensures your app feels native and intuitive regardless of where it is used.
Setting Up Localization in Flutter
To start, we integrated essential dependencies and configured the MaterialApp widget:
- Added dependencies like flutter_localizations for handling different locales.
- Configured MaterialApp with localization delegates (e.g., GlobalMaterialLocalizations) and supported locales (e.g., English, Spanish).
Creating Language Files
We used ARB (Application Resource Bundle) files to manage and organize localized strings:
- Each ARB file corresponds to a specific locale (e.g., en for English, es for Spanish).
- Examples demonstrated how to structure and maintain ARB files for different languages.
Generating Localization Classes
We utilized the intl_translation package to automate the generation of Dart code from ARB files:
- Extracted messages from Dart code into intl_messages.arb.
- Generated Dart files (e.g., messages_en.dart, messages_es.dart) to access localized strings programmatically.
Implementing Localization in Widgets
In Flutter widgets, we accessed and displayed localized content using generated localization classes:
- Used methods like AppLocalizations.of(context) to retrieve and display localized strings dynamically.
- Demonstrated how to integrate localized titles and messages into widget components.
Handling Locale Changes
To enhance user experience, we enabled dynamic locale changes within the app:
- Implemented state management (e.g., StatefulWidget) to update the app’s locale.
- Integrated a dropdown menu allowing users to select their preferred language at runtime.
Summing it up
Implementing localization strategies enables your Flutter application to effectively support multiple languages and adapt to diverse cultural contexts. This approach not only enhances accessibility but also broadens your app’s appeal to a global audience, fostering a more engaging user experience overall.
Given that we live in a global village, having a Flutter application with a global-first approach through localization makes a lot of sense.
If you need any assistance with Flutter app localization or any other mobile app development service, get in touch with our team at [email protected]. Xavor has been in the IT services industry for nearly three decades.
Our team of Flutter developers has delivered innovative cross-platform apps for startups, SMEs, and Fortune 500s.
Are you our next success story? Let’s find out!